STEP 1: SELECT THE BEST PLATFORM
If you wish to construct an excellent, cell pleasant, and a purposeful web site rapidly, you’ll want to decide on a platform (also called content material administration system).What do I imply by “content material administration system”?
Effectively, again in 2004 after I received began with internet improvement, most websites have been constructed utilizing HTML (code), CSS and even Flash. These took plenty of time to study and have been tough to grasp. That’s why most individuals nonetheless suppose creating a web site from scratch is troublesome or requires plenty of coding and design expertise. That’s not true. In 2020, content material administration methods (CMS) like WordPress have made creating a web site accessible to anybody. To place merely – content material administration system (or web site constructing platform) is a user-friendly platform for constructing web sites and managing your individual on-line content material as an alternative of utilizing a bunch of free HTML pages.Most Widespread Website Constructing Platforms in 2020
In latest statistics made by W3Techs, WordPress is the most well-liked content material administration system (55%) adopted by Joomla (20%) and Drupal (11%).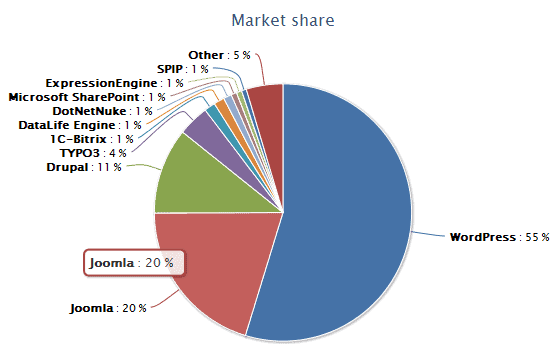
Right here’s why I like to recommend utilizing WordPress to construct your web site
WordPress vs. HTML & CSS: Studying HTML from scratch can take 6+ months, not to mention CSS and PHP. Having a fundamental data of HTML might help you gauge issues extra rapidly, however, if you wish to create a web site inside a day or two, studying HTML isn’t a viable possibility. WordPress vs. Web site Builders: Web site builders are costly and infrequently very restricted. They're good for one-page web sites, however no more. WordPress vs. Joomla/Drupal: Drupal is a really highly effective platform that's standard with internet builders and skilled coders, but it surely comes with a really steep studying curve that makes it a nasty alternative for newcomers. Joomla is just like WordPress and works nice for on-line shops, however you’ll want no less than a bit of little bit of technical coding to make it work the best way you need. In order for you extra particulars, I’ve put collectively a complete comparability between WordPress, Joomla and Drupal. If for some purpose you don’t need to construct your website with WordPress, take a look at my Drupal, Joomla and HTML5 guides as effectively. They're all FREE to make use of.For the newcomers, I strongly recommend sticking to WordPress.
It’s the simplest platform I’ve ever labored with, but it surely’s versatile sufficient to go well with everybody from small enterprise homeowners and freelancers to artistic artists and bloggers.THINGS TO DO BEFORE NEXT STEP
STEP 2: GET A DOMAIN & WEB HOSTING
 To be able to arrange your WordPress (or another kind of internet sites), you’re going to wish two issues:
- A site identify (an internet deal with like yoursitename.com)
- Internet hosting (a service that connects your website to the web)
The place do I get a FREE area identify and internet hosting?
Full disclosure: I earn a fee if you find yourself buying Bluehost via my referral hyperlinks on this information. This helps me to maintain WebsiteSetup up and operating and up-to-date. Thanks to your assist. I’ve principally used www.Bluehost.com as a website hosting and area registrar. They’re actually reasonably priced, have an excellent customer support, they usually’re at present throwing in a website identify without cost – so it’s price checking them out. While you get a website identify, you’ll additionally get a private e mail account(s): you@yoursite.com – far more skilled than a generic Gmail or Yahoo deal with. Have already got a website identify and internet hosting? Go forward and skip forward to step 3, the place I’ll clarify how one can arrange your web site.STEP 1: Go Bluehost.com
Keep in mind: Since I’m utilizing Bluehost myself, I’ve negotiated a particular low cost for WebsiteSetup.org guests (67% OFF).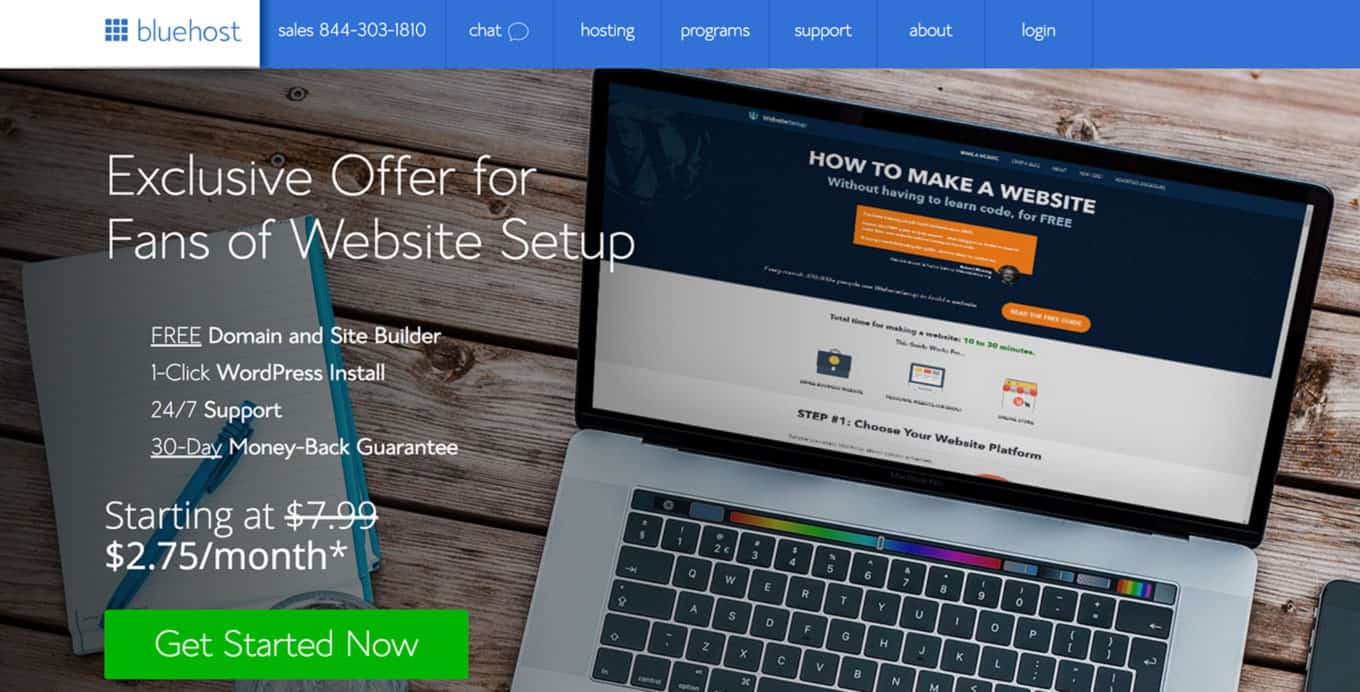
STEP 2: Select Web site Internet hosting Plan
When you click on “get began now,” you’ll be taken to a web page to pick the internet hosting plan of your alternative. I chosen their “fundamental” possibility, which is a good alternative for brand new web sites. Plus, in the intervening time they’re operating a particular low cost of $2.75/mo (often it’s $7.99/mo) The “plus” and “prime” plans are nice, however you don’t actually need all the additional bells and whistles they provide except there are tens of millions of individuals flooding your website every day. Save your hard-earned money and go for the most affordable bundle to begin out with.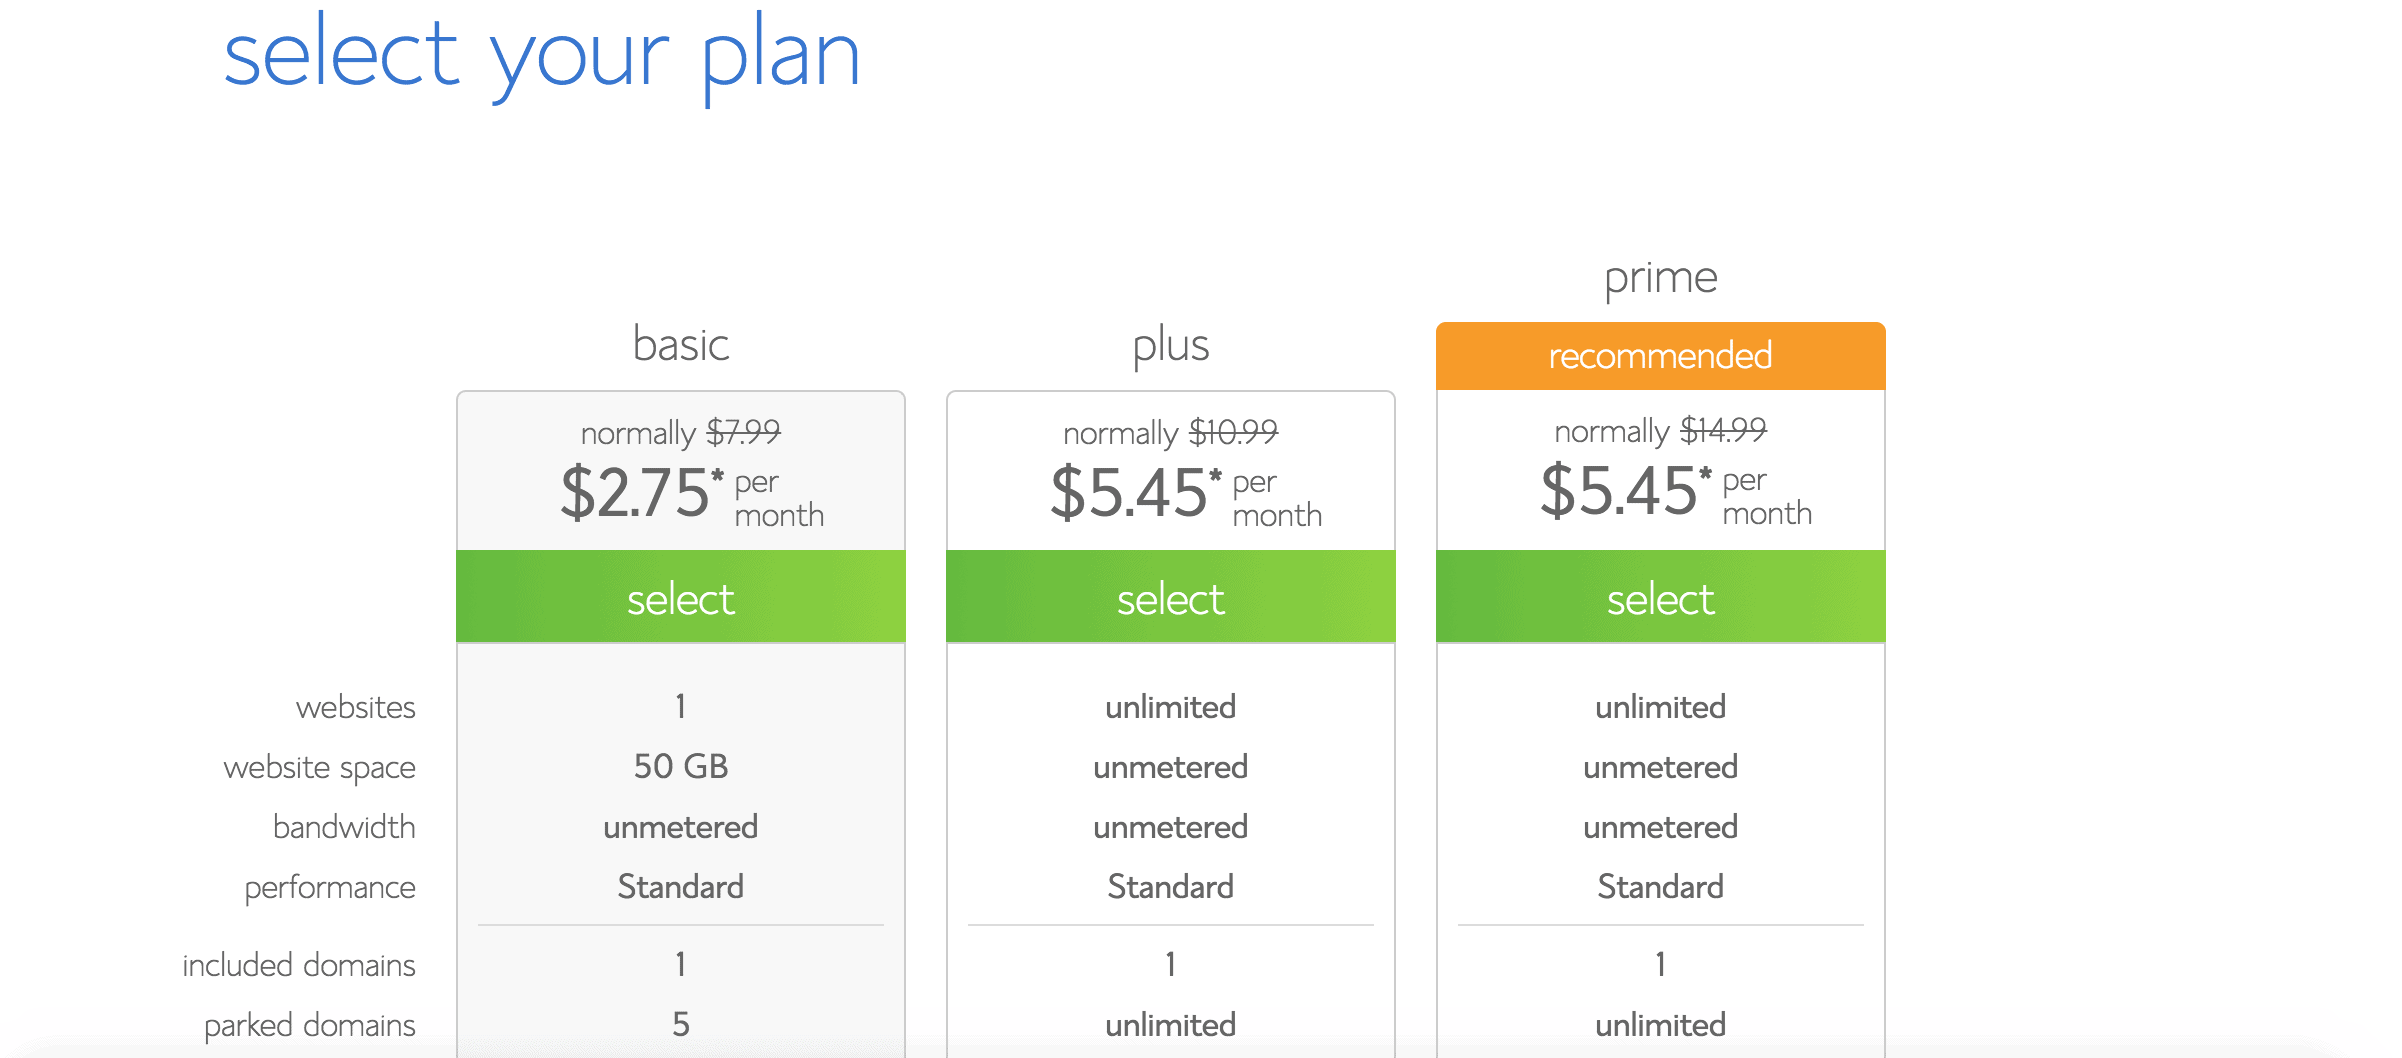
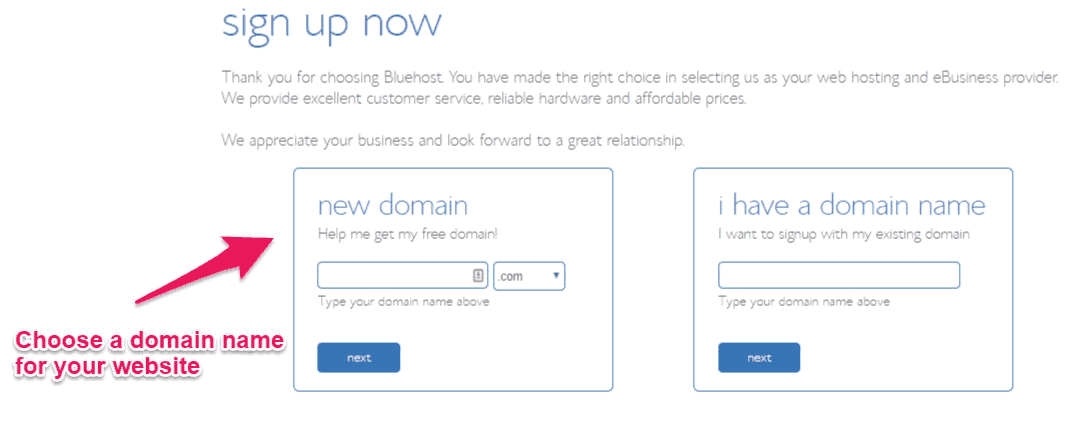
STEP 3: Decide an Area Title
As a simple start line:- When you’re making a web site for your corporation, your area identify ought to match your organization identify. For instance: YourCompanyName.com
- When you’re planning to arrange a web site for your self, then YourName.com is usually a nice possibility.
STEP 4: Fill In Your Particulars
To create your account, simply enter in your private info on the “create your account” web page. You’ll want so as to add in your first identify, final identify, nation, avenue deal with, metropolis, zip code, cellphone quantity, and e mail deal with. Your receipt will probably be despatched to the e-mail deal with you enter right here. It’s optionally available to additionally add in your corporation identify inside this type.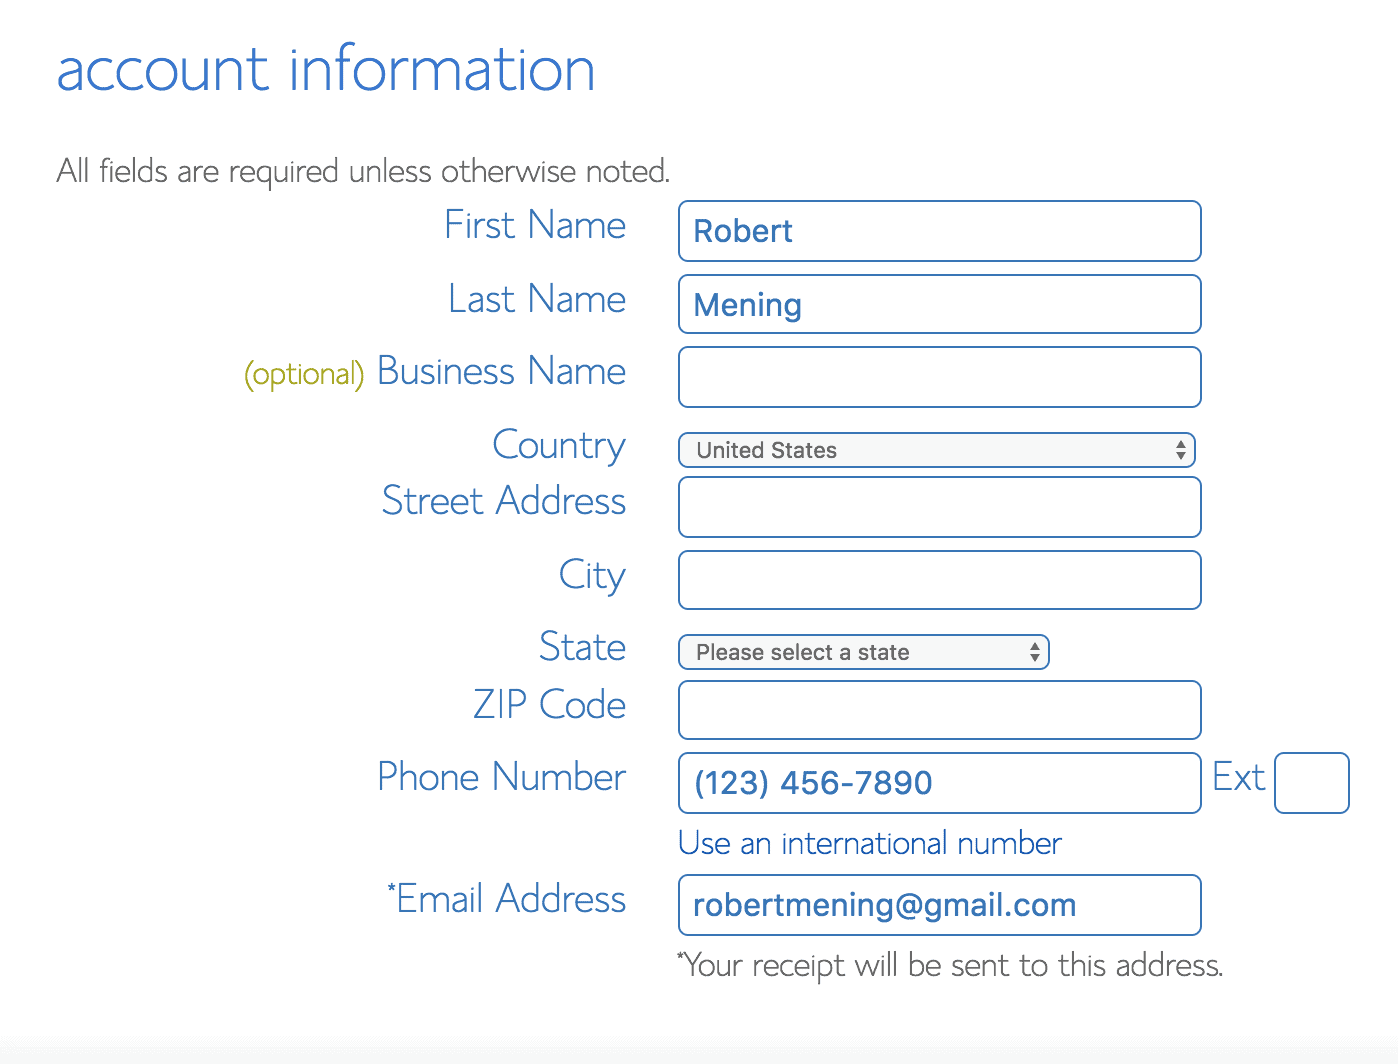 Enter your cost info to proceed.
STEP 5: Examine Your “Package deal Info” and End Registration
The subsequent step in registering for a Bluehost account is to pick your plan and bundle. These are the final steps you’ll undergo earlier than your account creation is full, so pay shut consideration to the additional choices obtainable, like Area Privateness Safety.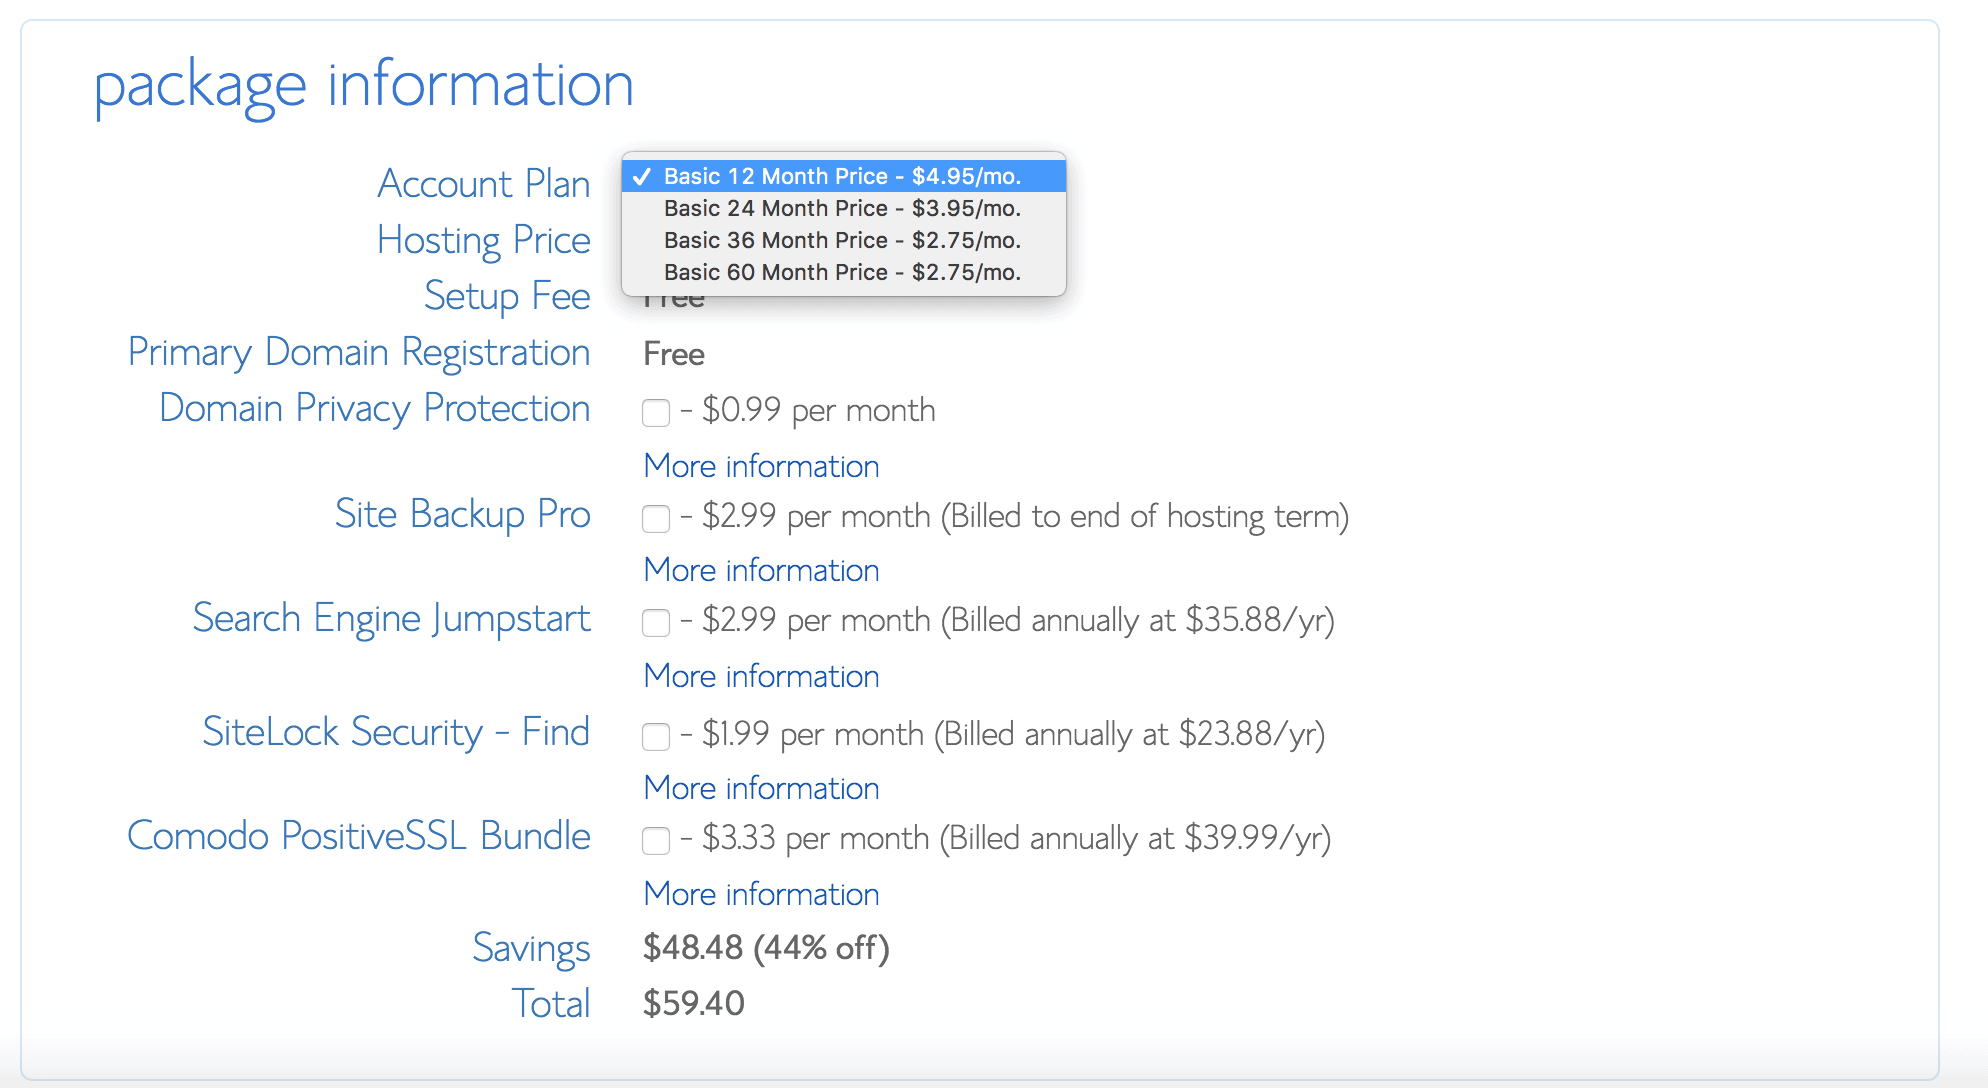
- Area Privateness Safety is just $0.99 cents extra monthly and retains your private info resembling your identify and deal with underneath the wraps.
- If you wish to maintain your web site and area info nameless, you'll be able to spend the additional $0.99 monthly. When you don’t, make sure you uncheck this field.
STEP 6: Create Your Password
As soon as paid and registered, you’ll have the ability to create your password: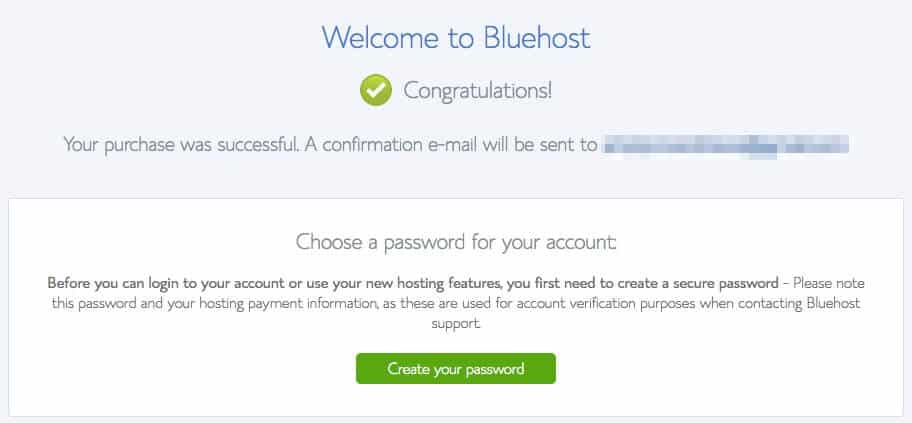
THINGS TO DO BEFORE THE NEXT STEP:
STEP 3: SET UP & CUSTOMIZE YOUR SITE
When you’ve purchased your area identify and arrange your internet hosting, you’re effectively in your means! Now it’s time to get your web site up and operating. The very first thing you’ll have to do is set up WordPress to your area.
Putting in WordPress
There are two doable methods to put in WordPress, one MUCH simpler than the opposite.1. TO CREATE A WEBSITE WITH WORDPRESS (OR JOOMLA & DRUPAL), USE ONE-CLICK INSTALLATION:
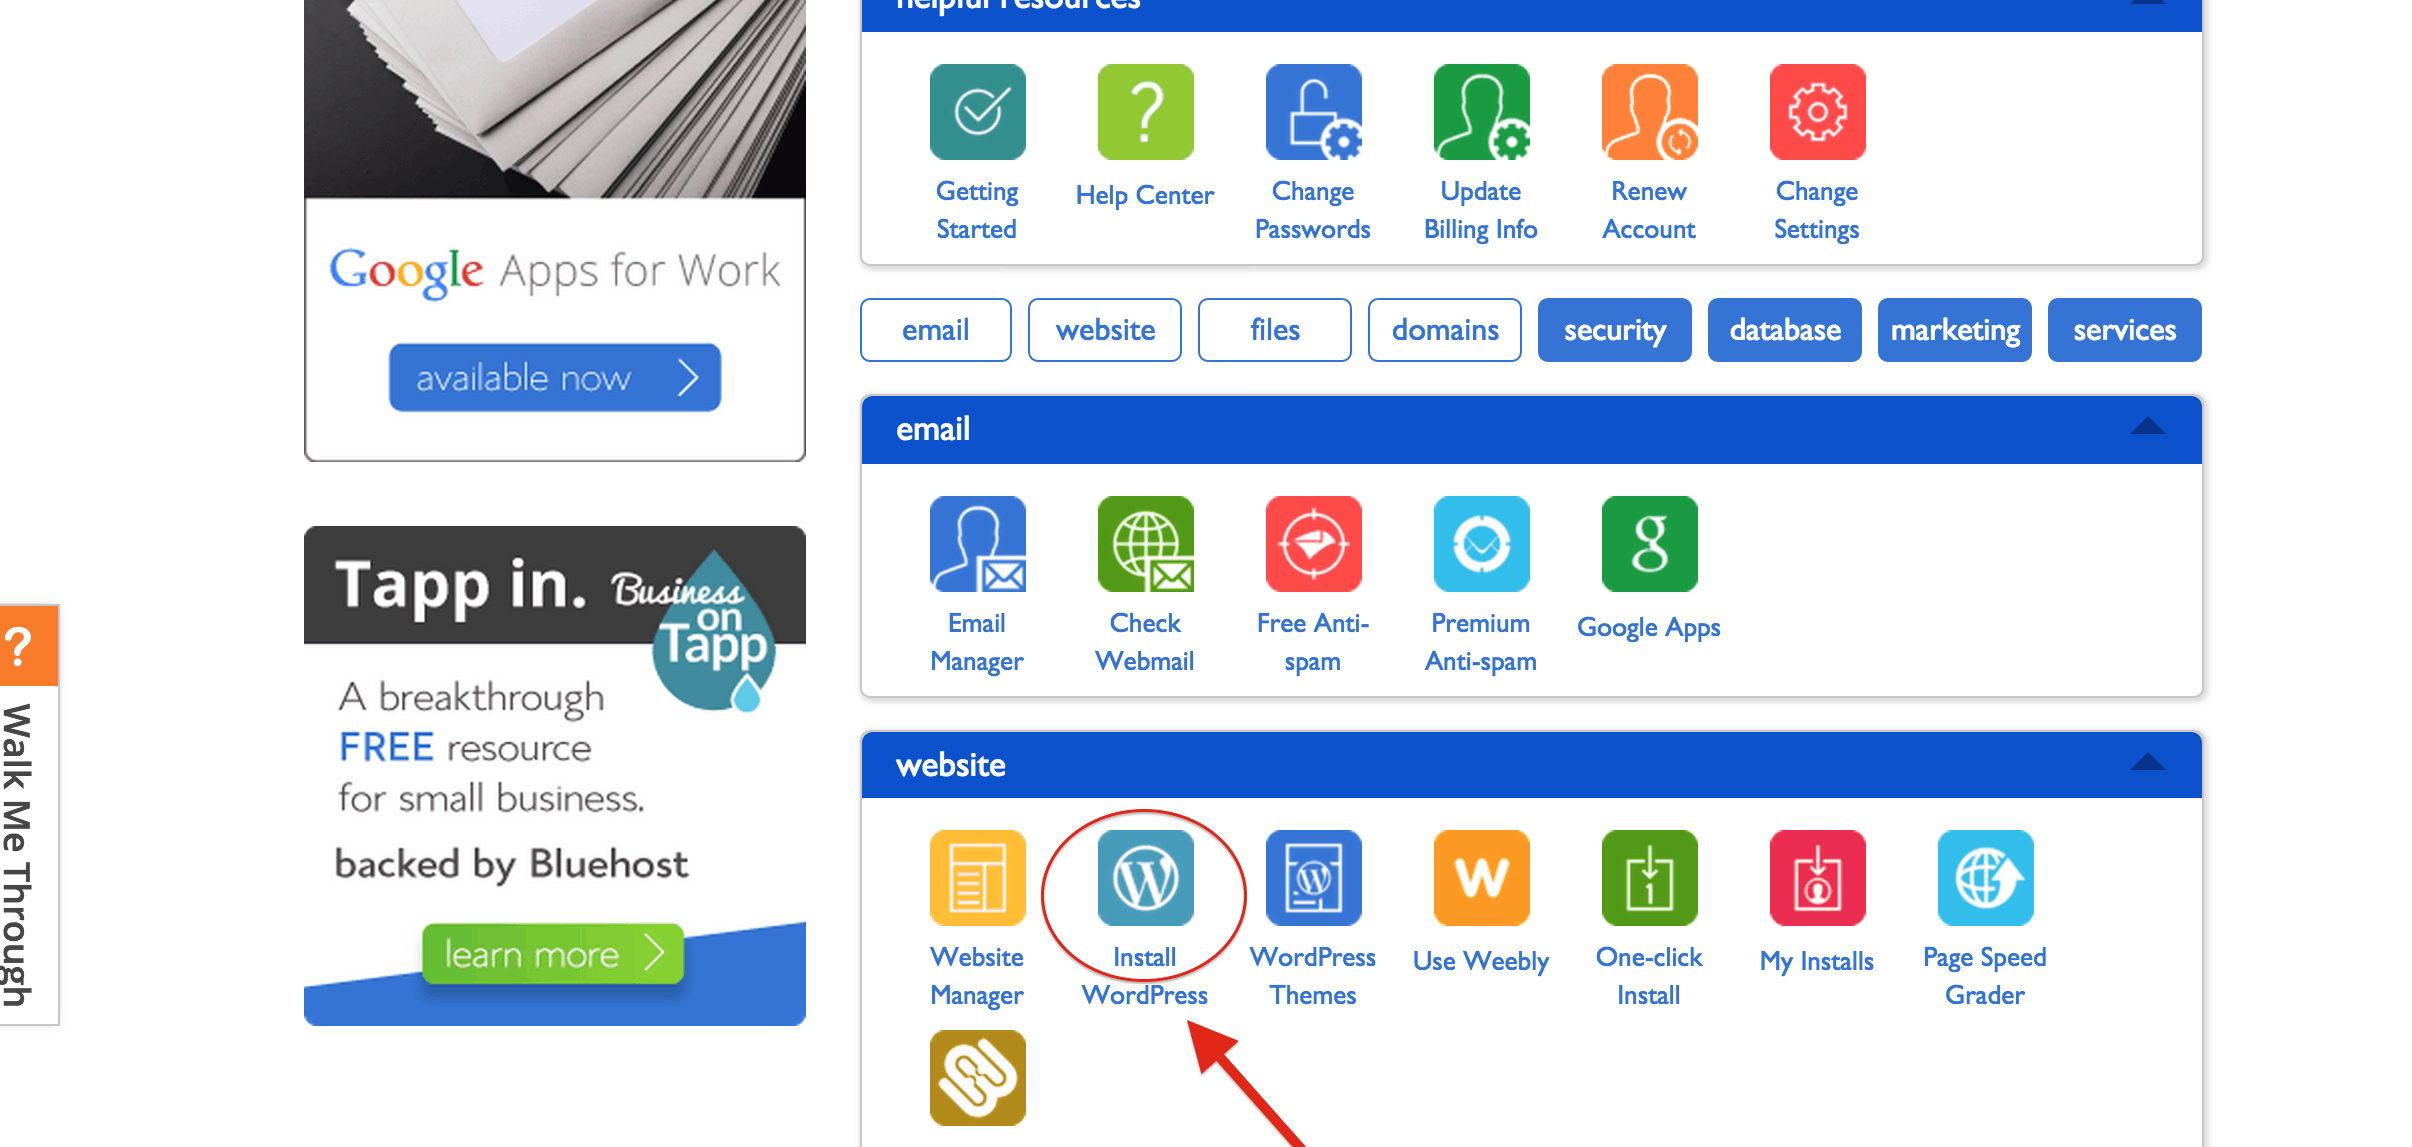
Virtually each dependable and well-established internet hosting firm has built-in 1-click-installation for WordPress, which makes getting going a snap. When you signed up with Bluehost or another comparable internet hosting firm, you need to discover your “1-click-installation” in your account management panel. Listed here are the steps you need to observe (ought to be comparable/similar on all the most important website hosting firms):- Log in to your internet hosting account.
- Go to your management panel.
- Search for the “WordPress” or “Web site” icon.
- Select the area the place you need to set up your web site.
- Click on the “Set up Now” button and you're going to get entry to your new WordPress web site.
2. … OR MANUAL INSTALL (if wanted)
If for some odd purpose (some internet hosting firms don’t present one-click-install for WordPress) you don’t have the choice to put in WordPress routinely, look this handbook information under:Putting in WordPress Manually
1) Obtain WordPress from right here: https://wordpress.org/obtain
2) Create a brand new folder in your desktop and unzip WordPress in it
3) Search for a file named wp-config-sample.php and rename it to: wp-config.php
4) Now open the wp-config.php (with notepad for instance) and fill the next strains:
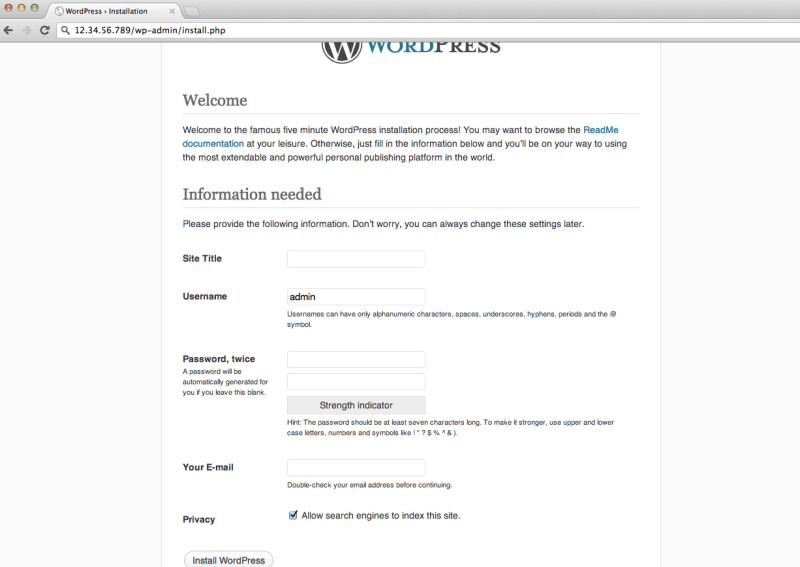 Simply fill within the varieties and you might be prepared!
Pssst – in the event that they don’t have 1-click-installation, possibly you’re coping with a nasty host!
- outline(‘DB_NAME’, ‘database_name_here’); – Database identify (in the event you don’t comprehend it, ask this out of your internet hosting assist)
- outline(‘DB_USER’, ‘username_here’); – Your internet hosting username
- outline(‘DB_PASSWORD’, ‘password_here’); – Your internet hosting password
Simply fill within the varieties and you might be prepared!
Selecting a Theme/Template to your website
Upon getting efficiently put in WordPress to your area, you’ll see a really fundamental but clear website: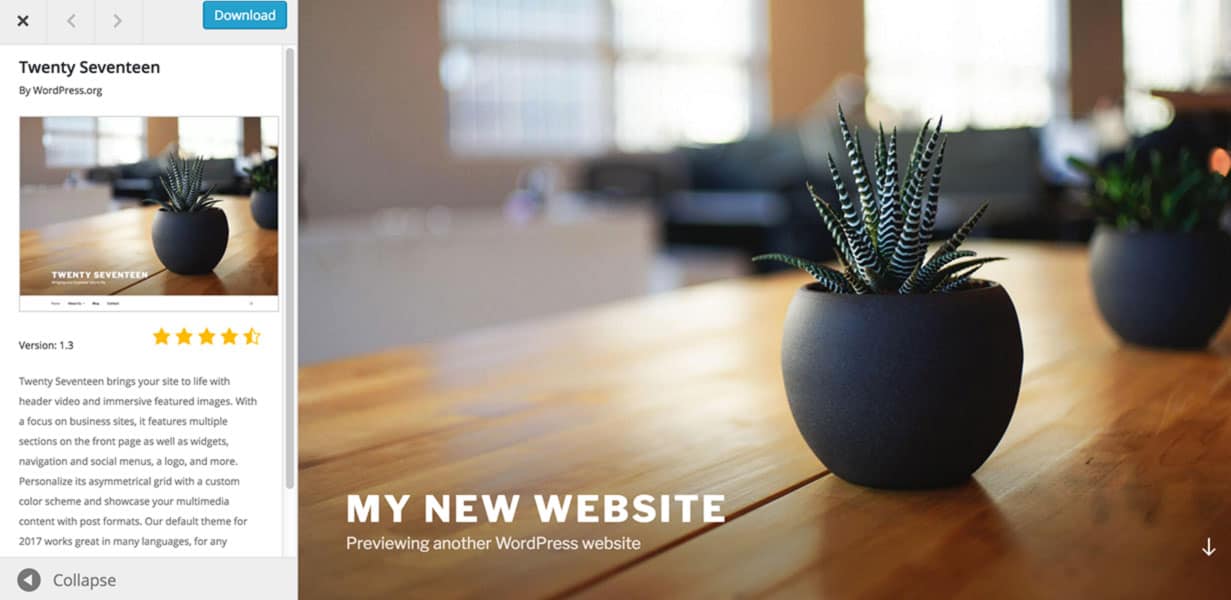 However you don’t need to appear like everybody else, do you?
That’s why you want a theme – a design template that tells WordPress how your web site ought to look. See a pattern model under:
However you don’t need to appear like everybody else, do you?
That’s why you want a theme – a design template that tells WordPress how your web site ought to look. See a pattern model under:
 Right here’s the place it will get enjoyable: There are millions of superior, professionally designed themes you'll be able to select from and customise to your personal sit.
Right here’s how one can discover a theme you want:
1. Log into your WordPress dashboard
When you’re undecided how, kind in: https://yoursite.com/wp-admin (change “yoursite” along with your area). That is what the WordPress dashboard seems to be like: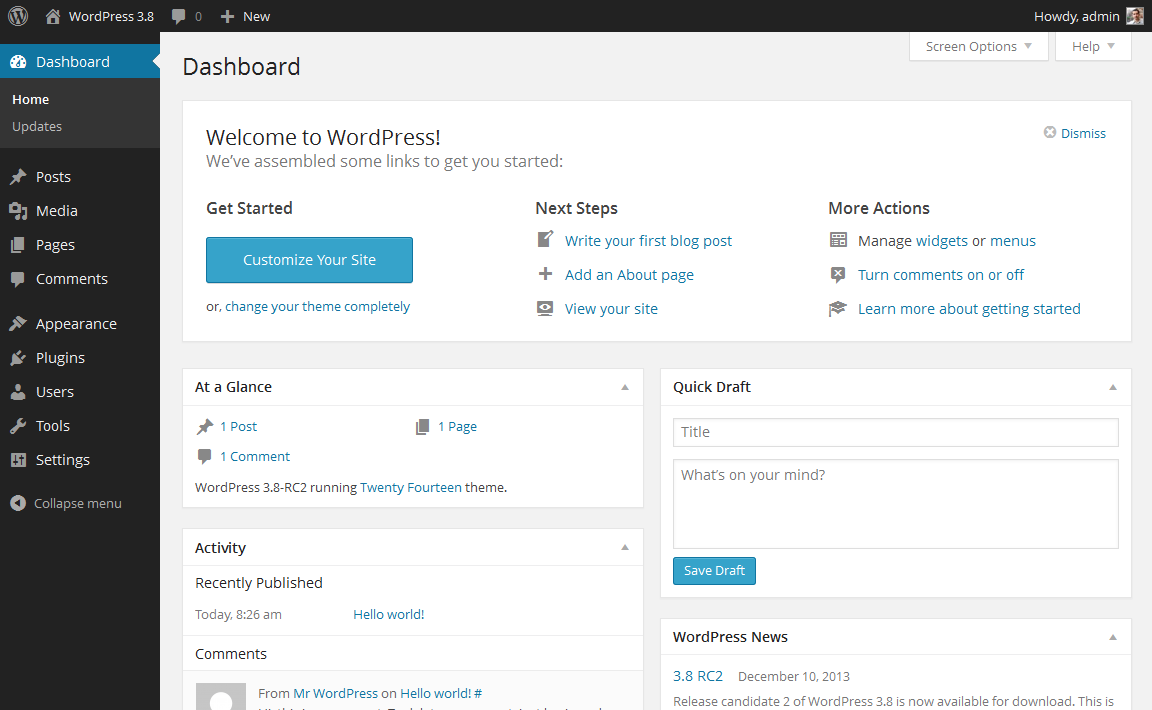 Every little thing is definitely labelled. When you’re feeling a bit overwhelmed, don’t sweat it – I’m going to point out you the place to go subsequent.
2. Entry FREE themes
When you’re on the dashboard, you’ve received entry to over 1500 free themes! Simply search the facet bar for “Look”, then click on “Themes”. In order for you one thing extra skilled or elegant than what you discover right here, you'll be able to head over to ThemeForest.net the place there’s a HUGE library of themes to select from at various prices. However earlier than you try this, I actually recommend you no less than attempt spending a while looking the free themes. A lot of them are literally actually skilled and effectively made; so don’t write them off.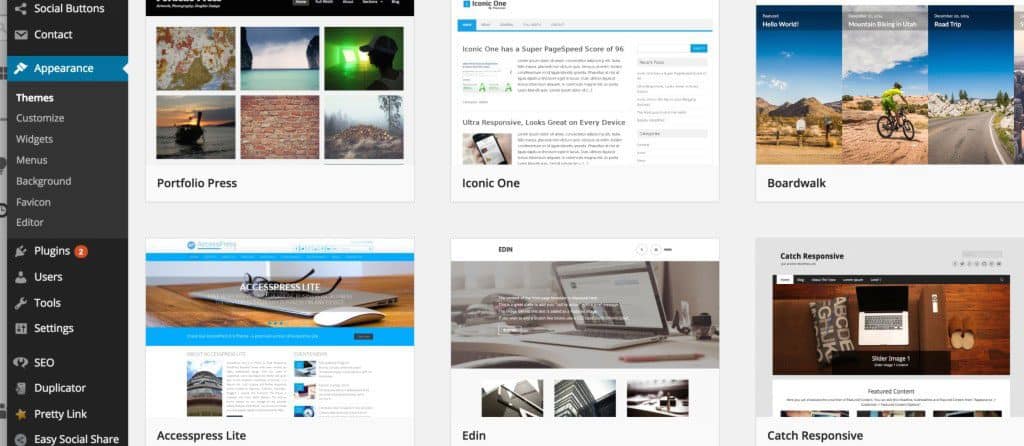 As you'll be able to see above, putting in a brand new theme to your web site could be very simple.
You'll be able to seek for particular key phrases and/or use filters to search out themes that fit your type. Discovering the right theme can take some time, but it surely’s price it.
You also needs to search for themes which can be “responsive”, as this implies they'll look good on any cell system.
Simply punch it in as one in every of your key phrases, and also you’ll be all set!
As you'll be able to see above, putting in a brand new theme to your web site could be very simple.
You'll be able to seek for particular key phrases and/or use filters to search out themes that fit your type. Discovering the right theme can take some time, but it surely’s price it.
You also needs to search for themes which can be “responsive”, as this implies they'll look good on any cell system.
Simply punch it in as one in every of your key phrases, and also you’ll be all set!
3. Set up your new theme
Upon getting discovered a theme you want, putting in it is so simple as clicking “Set up” adopted by “Activate”.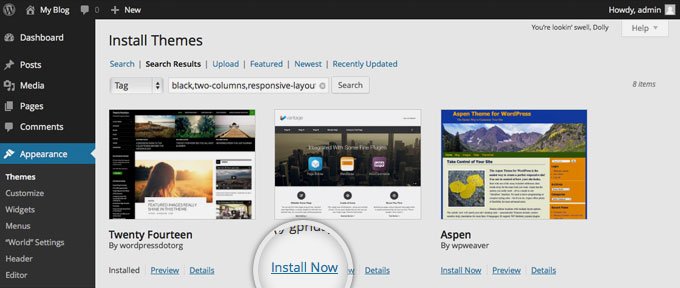 IMPORTANT: Altering themes received’t delete your earlier posts, pages and content material. You'll be able to change themes as typically as you need with out having to fret about dropping what you’ve created.
How do I add content material and create new pages?
Along with your theme put in, you’re prepared to begin creating content material. Let’s rapidly run via a few of the fundamentals:Including and modifying pages
Need a “Companies” web page, or an “About Me” web page (like I've on my menu on the prime of the location)? 1. Look alongside the sidebar within the WordPress Dashboard for “Pages” -> “Add New”. 2. You’ll discover a display screen that appears lots like what you’ve possibly seen in Microsoft Phrase. Add textual content, pictures and extra to construct the web page you need, then put it aside once you’re finished.Including pages to the menu
In order for you your new web page to be linked to your navigation bar, 1. Save any adjustments you’ve made to the web page by clicking “Replace” 2. Click on “Look” -> “Menus” within the sidebar of the WordPress Dashboard 3. Discover the web page you created and add it to the record by clicking the checkbox subsequent to it after which “Add to Menu”.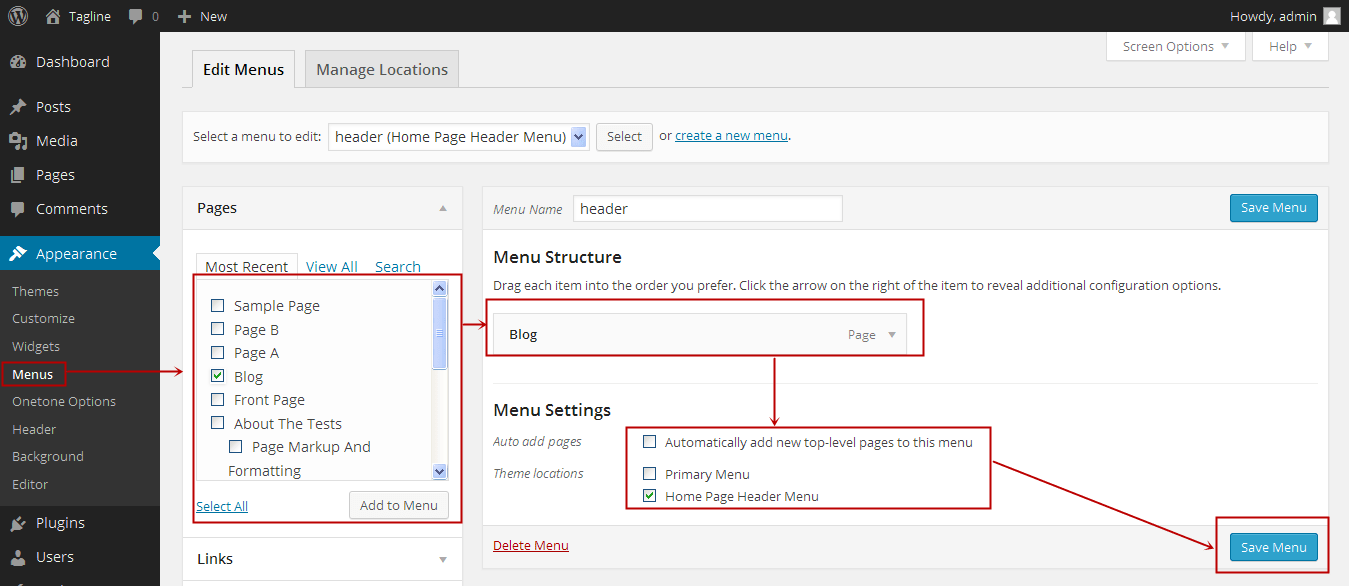
Including and modifying posts
When you've got a weblog in your web site, “Posts” will probably be the place you flip to subsequent. You should use totally different classes to group comparable posts.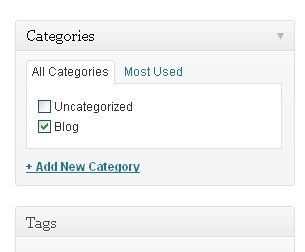 If you wish to add a weblog to your web site, you should utilize totally different classes and posts. Let’s say you need to create a class named “Weblog”. Merely add it to your menu and begin making posts.
Right here’s what it is advisable to do:
a. Create a brand new class by going to “Posts -> Classes”
OR
b. Create a weblog submit by going to “Posts -> Add New”. When you’ve completed writing your weblog submit, it is advisable to add the correct class for it.
When you’ve created your class, merely add it to the menu, and also you’re in enterprise!
If you wish to add a weblog to your web site, you should utilize totally different classes and posts. Let’s say you need to create a class named “Weblog”. Merely add it to your menu and begin making posts.
Right here’s what it is advisable to do:
a. Create a brand new class by going to “Posts -> Classes”
OR
b. Create a weblog submit by going to “Posts -> Add New”. When you’ve completed writing your weblog submit, it is advisable to add the correct class for it.
When you’ve created your class, merely add it to the menu, and also you’re in enterprise!
Customization & Infinite Tweaks…
On this part, I’ll cowl a few of the basic items I’m requested about on a regular basis that can assist you tweak your web site.Altering Your Title and Tagline
Web page titles clarify to searchers what your web site is about. They’re additionally a giant a part of how engines like google decide your rankings. You need to make certain they’ve received the key phrases you need to have targeted (however in a pure means, written for actual individuals). You need to use a novel title on each web page of your website. For instance, my website’s title is “Learn how to Make a Web site”. (Can’t discover it? Simply maintain your mouse over the tab on the prime of your internet browser). Taglines are added on the finish of titles throughout each web page. My website’s tagline is “Step by Step Information” To be able to change the title and tagline in your web site, go to “Settings -> Common” and fill within the type under: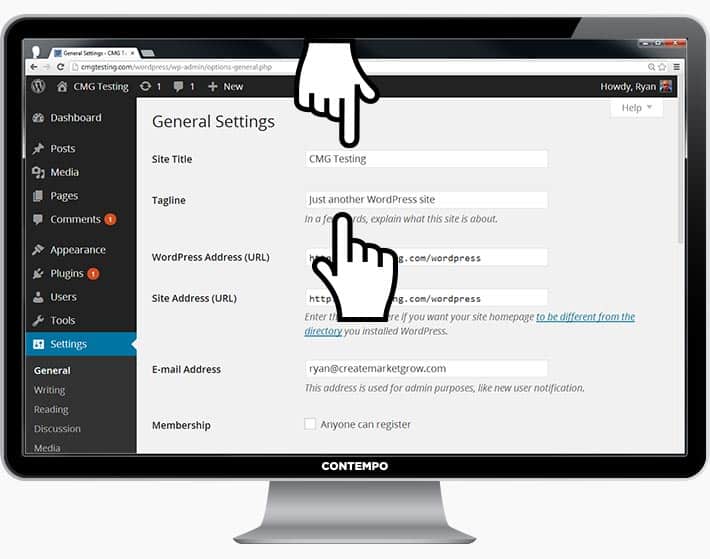
Disabling Feedback for Posts & Pages
Some web sites (enterprise/organisation websites principally) don’t need their guests to have the ability to touch upon their pages. Right here’s how one can shut feedback off on WordPress pages: 1. While you're writing a brand new web page, click on “Display Choices” within the prime proper nook. 2. Click on the “Dialogue” field. The “Permit Feedback” field will seem on the backside. 3. Untick “Permit Feedback”. Wish to disable feedback on each new web page by default? 1. Go to “Settings -> Dialogue” and untick “Permit individuals to submit feedback on new articles”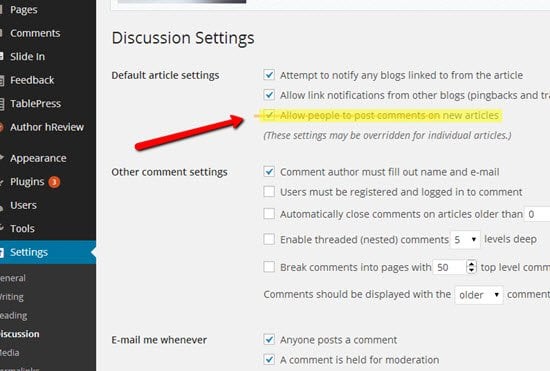
Setting Up a Static Entrance Web page
Some individuals contact me saying they’re annoyed that their dwelling web page seems to be like a weblog submit. You'll be able to repair that by making your private home web page “static”. A static web page is a web page that doesn’t change. Not like a weblog, the place the primary new article will present up on the prime each time, a “static” web page will present the identical content material each time somebody involves the location – like a house web page you’ve designed. To arrange a static entrance web page: 1. Go to “Settings -> Studying” 2. Select a static web page that you've created. “Entrance Web page” denotes your private home web page. “Posts web page” is the entrance web page of your weblog (in case your complete website isn’t a weblog). When you don’t select a static web page by yourself, WordPress will take your newest posts and begin exhibiting them in your homepage.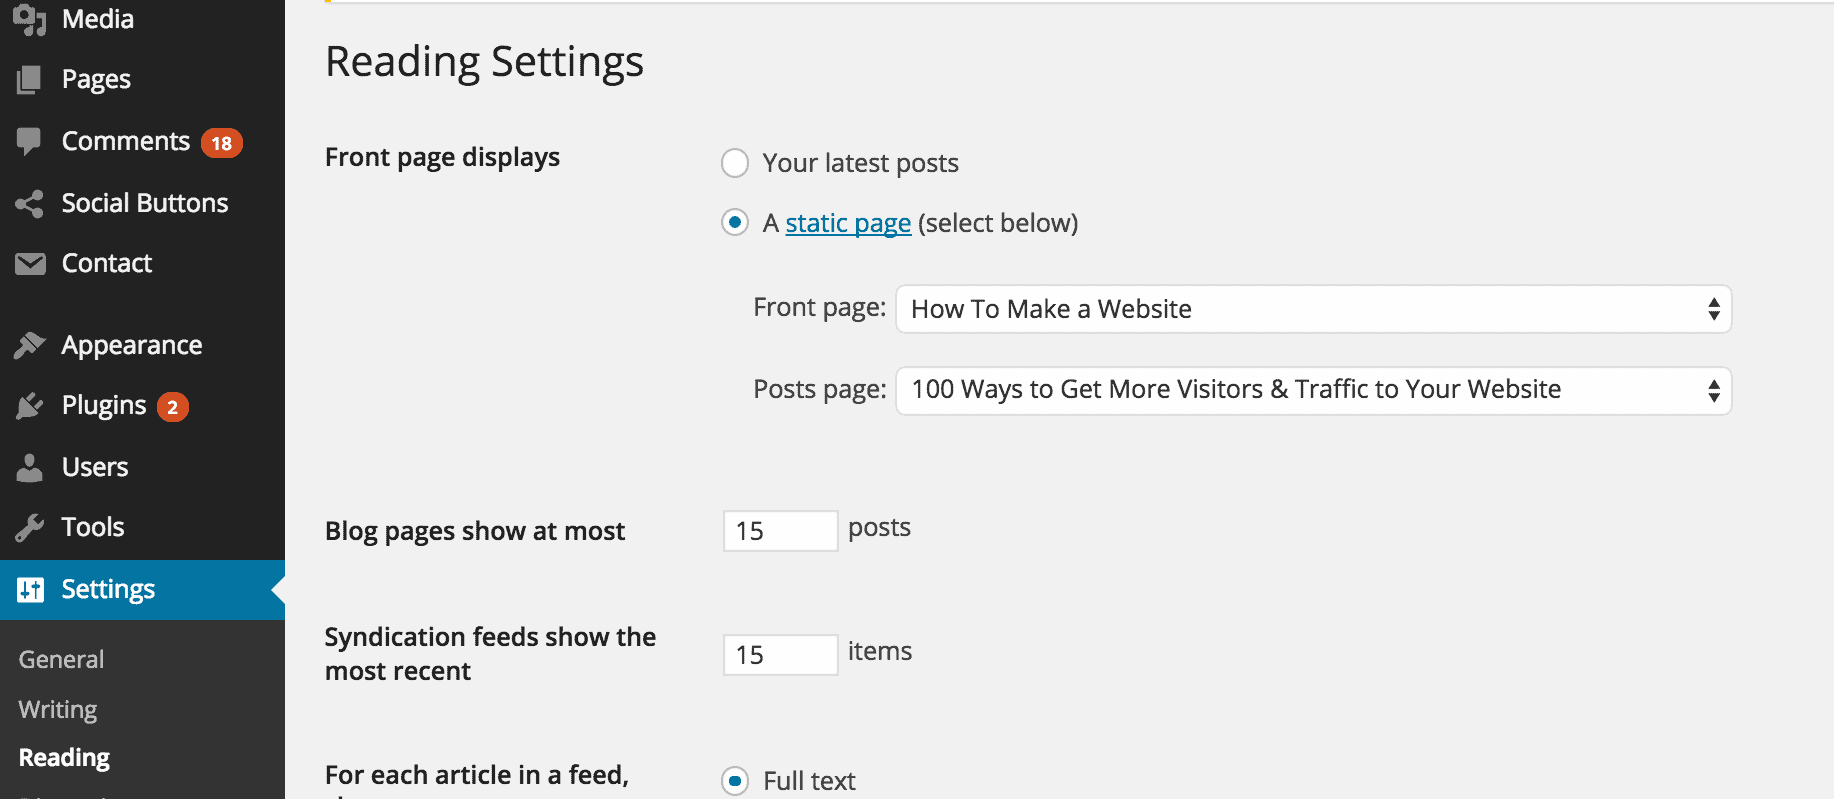
Modifying sidebar
Most WordPress themes have a sidebar on the correct facet (in some circumstances it’s on the left). If you wish to eliminate the sidebar or edit out objects you don't want like “Classes”, “Meta” and “Archives”, that are often pointless, right here’s how: 1. Go to “Look -> Widgets” within the WordPress Dashboard. 2. From right here, you should utilize drag and drop so as to add totally different “bins” to your sidebar, or take away the objects you don’t need. There’s additionally an “HTML field” – a textual content field the place you should utilize HTML code. For newcomers, don’t fear about this – simply drag and drop the weather you’d like in your sidebar.Putting in Plugins to Get Extra out of WordPress
What's a plugin?
“Plugins” are extensions which can be constructed to broaden WordPress’ capabilities, including options and capabilities to your website that don’t come as built-in. They’re shortcuts to getting your website to do what you need to, with out having to construct the options from scratch. You should use plugins to do the whole lot from including picture galleries and submission varieties to optimizing your web site and creating an internet retailer.How do I set up a brand new Plugin?
To start out putting in plugins, go to “Plugins -> Add New” and easily begin looking out. Remember that there are over 25,000 totally different FREE plugins, so that you’ve received a LOT to select from! Set up is simple – when you discover a plugin you want, simply click on “Set up”. To save lots of you a while, I’ve put collectively a listing of the most well-liked plugins that site owners discover helpful:- #1 Contact Form 7: My web site has a contact type on my About web page. It’s an superior characteristic to have, as individuals (such as you!) can fill within the type and ship me an e mail with out logging into their very own e mail supplier. If you wish to do one thing comparable, undoubtedly get this plugin. P.S.
- #2 Best SEO Plugin: Yoast SEO Plugin for WordPress: If you wish to make your WordPress website much more Web optimization-friendly, this plugin is a must have. It’s free, and it’s superior. You’ll have the ability to edit your title tags, meta descriptions and extra, all from throughout the web page itself – no extra fussing with WordPress settings.
- #3 Plugin from Google: Google Analytics: Inquisitive about monitoring your guests/site visitors and their behaviour? Simply set up the plugin, join it along with your Google account and also you’re able to go.
Comments
Post a Comment